Monday, August 7, 2017

Synching Date and Time using NTP for Proxmox

Time Synchronization (NTP) in Proxmox


For many years I have been thinking wrongly about this topic.  I thought I have to sync the time for each OpenVZ / LXC container against NTP servers.

 I have even wrote a blog about this:

Enable automatic time synchronization for OpenVZ container in Proxmox (for Ubuntu / Debian)

I have just found out that I was wrong and making this much more difficult.

Proxmox PVE actually will and should automatically sync time against NTP servers.  Again the key word here is SHOULD. If it does not you have to find out why and fix it. However if it works, the Proxmox PVE hardware node should always have the correct time and all the containers and virtual servers should also have accurate date and time automatically as well.

That is right folks, all Date and Time sync issue should be automatic. If they are not or your date and time is out of sync here are a few things I would recommend you check and try to fix on your Proxmox PVE hardware node.


CHECK POINT 1 - make sure your DNS resolution IP is correct

nano /etc/resolv.conf

Make sure all the entries in there are correct. My entries here are usually very simple, I just point all my servers to Google's DNS like this:


nameserver 8.8.8.8
nameserver 8.8.4.4


CHECK POINT 2 - make sure NTP client has not been corrupted

nano /etc/ntp.conf

You should change the content to:

server ntp1.internal.local iburst
server ntp2.internal.local iburst

then restart the NTP service:
service ntp restart


CHECK POINT 3 - Try to do a manual time synchronization

You should be able to perform this command without error:

ntpdate -s time.nist.gov

if you get error or ntpdate not found, you should try to install ntpdate using this command:

apt-get update
apt-get install ntpdate

Saturday, August 5, 2017

How to convert OpenVZ container to LXC container on Proxmox

I started with Proxmox 2.x many years ago. I deployed several Proxmox clusters however my biggest deployment was on Proxmox 3.x.

Proxmox 4.x and above dropped OpenVZ, that is right ... no more OpenVZ on Proxmox. It is okay though because LXC is just as good or even better.

For many people like myself who has lots of OpenVZ containers, the first concern is what do I do now? Am I stuck forever with OpenVZ? Will I ever be able to upgrade to Proxmox 4.x or above and use LXC?

The answer is surprising YES!

The process is actually easier than I thought.  Proxmox actually make it super easy. If you backup a OpenVZ container into a tar, tar.gz tar.lzo (compressed), you can simply copy it to the newer proxmox server with LXC into its 'dump' directory (usually in /var/lib/vz).

Here are all the steps:

STEP 1 - BACKUP THE OPENVZ CONTAINER


STEP 2 - COPY TO PROXMOX WHICH SUPPORT LXC

File OpenVZ backed up file is usually located in /var/lib/vz/dump directory of your Proxmox server.
You can copy using 'scp' or just download it to your computer, and copy it to its destination server manually.


STEP 3 - RESTORE AND CONVERT THE OPENVZ TO LXC

Login to the newer Proxmox which support LXC.
Click on the storage that contains the OpenVZ tar file.

Just restore it just like if you would with any LXC backed up file:


STEP 4 - ADJUST / CHANGE NETWORK SETTINGS

After you have successfully restore the OpenVZ and converted to LXC at the same time... the one setting that usually always get left behind (or messed up) is the network setting.

It also may be a good idea to review all the other options such as 'Resources', 'Options', etc... since you have moved the container from a different server... the new server may have different resources, etc...


STEP 5 - START AND TEST THE SERVER

You should see the LXC container works and boots as normal!


Shrinking a Windows Virtual Machine using Proxmox PVE which uses QEMU / KVM QCOW2 image format

I made a mistake by allocating too much disk space for my Windows 7 virtual machine.

Here are the specs of Virtual Machine that I have experience with:

Windows 7 64-bit
Original size: 64GB (I would like to reduce the size by 15GB)
Proxmox PVE 4.x
Qemu KVM using QCOW2 file format

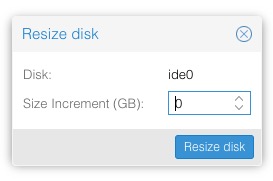
While you can increase the disk space easily just by using the Proxmox interface (see below), you CAN NOT reduce / shrink disk space. The reason why is simply because the operating system already allocated space internally, and you can not just reduce the space of the container without first reducing the space allocated by the OS.


You can only increment (increase) size, not decrease.


Even though this blog was my experience with Windows 7, you should be able to use this technique with Windows 8 or 10.

I will show you all the steps I performed to reduce my QCOW2 image file.


STEP 1 - SHUT DOWN THE VM (optional - if you don't need backup go to step 3)
(you should know how to do this)


STEP 2 - BACKUP THE IMAGE FILE (optional - if you don't need backup go to step 3)

  • login to your proxmox using ssh
  • navigate to /var/lib/vz/images
  • copy the QCOW2 file to another file / location like this:

    cp vm-102-disk-1.qcow2 vm-102-disk-1-backup.qcow2


STEP 3 - START THE VM
(you should know how to do this)


STEP 4 - USE DISKPART TO REDUCE VOLUME SIZE

  • login to Windows
  • execute diskpart from command line:  go to start menu, type 'diskpart' + enter
  • use command line app 'diskpart' to reduce volume size, see example below for reducing my volume by 15GB:

    list disk   (optional - but necessary if you have multiple disks)


    list volume


    select volume 1


    shrink desired=15360

STEP 5 - DOWNLOAD SDELETE and EXECUTE IT

STEP 6 - SHUTDOWN THE VIRTUAL MACHINE
After sdelete has completed, immediately shutdown the window virtual machine.

STEP 7 - SHRINKING THE QCOW2 FILE
this is the last step, but before we execute qemu-img we should backup the original QCOW2 file by copying it to another filename ending with '-ORIGINAL'. Then we execute qemu-img. After the process finish you should test the Windows VM to make sure it is operating normally.

mv vm-105-disk-1.qcow2 vm-105-disk-1-ORIGINAL.qcow2

qemu-img convert -O qcow2 vm-105-disk-1-ORIGINAL.qcow2 vm-105-disk-1.qcow2

Also, don't forget to check the final size of the QCOW2 file. Mine shrunk to 26GB from 64GB, not sure why I got 26GB saving when I only asked for 15GB. But since everything works. I am happy to have had reclaimed more space. :-)

When all are done and you have tested the Windows VM to confirm everything still works after the shrinking process, you can delete the backup QCOW2 file.

Thursday, August 25, 2016

Failed to remove or destroy openvz container in Proxmox

Something went wrong when I was creating and removing containers on Proxmox 3.x

Somehow I can not remove one of my OpenVZ container from Proxmox UI, I got this error

stat(/var/lib/vz/root/285): No such file or directory
Container is currently mounted (umount first)
TASK ERROR: command 'vzctl destroy 285' failed: exit code 41


I searched all over Google and did not find a solution. I fix the issue and found the following commands executed in the hardware node will solve this problem:

The VM ID that I am trying to remove is 285
The RED color commands are the commands that you need to solve this Fail to Destroy OpenVZ container issue.

I tried to destroy the VM from CLI but received the following error:
root@a11:~# vzctl destroy 285
stat(/var/lib/vz/root/285): No such file or directory
Container is currently mounted (umount first)

Then I tried to unmount it and still received error:
root@a11:~# vzctl umount 285
stat(/var/lib/vz/root/285): No such file or directory
realpath(/var/lib/vz/root/285) failed: No such file or directory
Can't umount /var/lib/vz/root/285: No such file or directory

So I created an empty directory to satisfy it
root@a11:~# mkdir /var/lib/vz/root/285
root@a11:~# vzctl umount 285
stat(/var/lib/vz/private/285): No such file or directory
Can't umount /var/lib/vz/root/285: Invalid argument

Still complaining about missing one more directory, so I created that one too
root@a11:~# mkdir /var/lib/vz/private/285
root@a11:~# vzctl umount 285
CT is not mounted

Finally able to unmount it, so I executed the destroy VM command next
root@a11:~# vzctl destroy 285
Destroying container private area: /var/lib/vz/private/285
Container private area was destroyed

Awesome! it works! I hope this helps someone :-)

Monday, June 6, 2016

PFSense firewall inside Proxmox using QEMU / KVM virtual machine - SLOW performance

Last week I attempted to install PfSense as qemu virtual machine in my Proxmox 4.x server.  I have an extra NIC with 1Gbps port and I thought it would be cool if I can retire my router and just route everything using PFSense because PFSense as a firewall is awesome (Tons of features).

I have installed it using the following steps, it was easy and I did not experience any issue:

1. Downloaded ISO (AMD64)  from PFsense download page
    at the time of this writing the newest stable AMD64 version was: pfSense-CE-2.3.1-RELEASE-amd64.iso
    I copied the live-cd ISO to /mnt/{your local storage}/template/iso

(I also included a link to my downloadable QEMU backup image - you can restore within 5 min - see below)

2. Edited my network interface setting at /etc/network/interfaces to add my extra NIC as VMBR1

I added:

allow-hotplug eth1
iface eth1 inet manual

auto vmbr1
iface vmbr1 inet dhcp
        bridge_ports eth1
        bridge_stp off
        bridge_fd 0


3. Created Proxmox VM with the following settings:
     CPU Type: 1 socket, 2 cores, default kvm64 (qemu64) did not work for me.
     RAM: 512MB
     Disk: 8GB, virtio (scsi, qcow2)
     Network:  Virtio (bridged)

here is a screenshot of my configuration in proxmox ve:


     Important:  Once PFSense web configurator is running, make sure to go in System > Advance > Networking and disable hardware checksum offload. If you do not do this network packets from LAN to WAN will be SLOW and will not work well.

here is a good read about Virtio network driver for PFSense:  https://doc.pfsense.org/index.php/VirtIO_Driver_Support


4. Once PFSense booted I also added the following options in /boot/loader.conf

hint.apic.0.clock=0
kern.hz=100

SLOW and DISAPPOINTING PERFORMANCE

After I got everything running and was able to use this PFSense firewall as my main router, I noticed the CPU utilization was much higher than I expected.

In proxmox, this VM CPU utilization was 15 - 40%

In PFSense dashboard CPU utilization reported 20% - 87%

Then I performed some speed tests... I was disappointed. This PFSense VM performed 40% slower than my Netgear / Asus gigabit router!  I have a gigabit internet connectivity, I can get approximately 800Mbps - 920Mbps on my AC Wireless routers. However with this PFSense VM I can only achieve 350 - 480Mbps?!?  And when I was doing speedtest (from Speedtest.net) CPU Utilization on PFSense dashboard went up to 87%!!!

Summary

After spending 4 - 5 hours installing and setting up PFSense on Proxmox, I decided not to use it. I am disappointed with its performance!  I use PFSense at work (also virtualized inside Proxmox) and I am very happy with it.  Maybe the high CPU usage and slow performance I get is due to my J1900 Quad Celeron CPU that I have in my home server?!?  Not sure.


Downloadable PFSense QEMU / KVM Image Download

Event though I have decided NOT to use this PFSense VM configuration, I have a completely new and tested working PFSense configuration with default settings.

If you need to get up and running quickly with version PFSense version 2.3.1 for Proxmox QEMU you can download my image here:

https://dl.dropboxusercontent.com/u/32732184/vzdump-qemu-106-2016_06_06-11_33_43-pfsense-231.vma.lzo

Things to do after you 'restored' the image above:

1. set your network and turn them on.
    for both net0 and net1 I have set them both to VMBR0 so that you can boot the PFSense immediately. But you probably want to set net1 to VMBR1.

2. I also have set the link to disconnected, link down=1, so you probably want to enable them both to use them.


Wednesday, March 30, 2016

Redirect ports for Remote Desktop RDP into QEMU / KVM Virtual Machine in Proxmox NAT Mode

I have a virtual machine running Window 7 for a client. I have been trying to allow the client to use their Window 7 machine via remote desktop (RDP). However since I have configured the QEMU / KVM virtual machine in Proxmox using NAT mode networking, the local IP address that is being assigned to the machine is 10.0.2.15 and I have had difficulty figuring out how to allow RDP traffic to connect to the virtual machine.

Since I have spent hours (barely anything useful googling around) trying to figure this out, I hope this may help somebody.

The solution was to REDIRECT the port from the Proxmox hardware node to the VM using the -redir setting.

First you would want to test the concept by typing the following commands into your SSH Shell:

qm set 123 -args "--redir tcp:30889::3389"
qm set 123 -args "--redir udp:30889::3389"

The commands above will redirect both TCP and UDP protocol from the hardware node's port 30889 to the virtual machine's port 3389.

I choose 30889 (different than the default RDP 3389 port) on purpose to show we are redirecting (kind of like port forwarding). Another reason is because I always use non-default ports to prevent brute force attacks (hope to make it more difficult for hackers to guess).

Once you successfully executed the commands above, you should then try to connect via remote desktop. Remember to use port 30889 to connect.

If the above works... then you need to make this option permanent for your hardware node by adding the following line in your QEMU SERVER configuration file:

args: -redir tcp: 30889::3389 -redir udp: 30889::3389

your vm configuration file should be located in:
/etc/pve/qemu-server

Here is the exact content of my configuration file:

args: -redir tcp: 30889::3389 -redir udp: 30889::3389
bootdisk: ide0
cores: 4
ide0: localmd0:123/vm-123-disk-1.qcow2,format=qcow2,size=64G
memory: 8192
name: ihtirqb
net0: e1000={myhiddenmacaddress}
numa: 0
onboot: 1
ostype: win7
sockets: 1


Monday, March 21, 2016

Proxmox commands cheat sheet to be executed in hardware node

# ---- CHECK PVE CLUSTER STATUS

pvecm status
pvecm nodes

pveversion -v

# ---- STOP PVE SERVICES -----

service pvestatd stop
service pvedaemon stop
service cman stop
killall -9 corosync cman dlm_controld fenced
service cman stop
service pve-cluster stop

# ---- START PVE SERVICES -----

service pve-cluster start
service cman start
service pvedaemon start
service pvestatd start

# ---- OPENVZ --------
vzlist -a

# ---- QEMU --------
qm list